Southern Agrarianism and the culture of the Old South

Category: Garden (Page 3 of 6)

The WaterBuck Pump

waterbuck-pic
We’ve covered manually-operated water pumps several times previously, and for good reason: without a dependable source of water, nothing lives – including you and your family. You can’t have a self-reliant homestead without an absolutely reliable source of water. For some folks that may mean a sweet, clear spring; it may mean a nearby stream and a good filtration system; it may mean a cistern with an efficient rain collection system. For most of us though, the best choice is having our own well with a non-electric pump.

The WaterBuck Pump is a pump unlike anything you’ve ever seen before. It doesn’t look like your grandparents’ hand pump, and it doesn’t pump like it either. When you need to pump the quantity of water that it takes to water a large garden, supply livestock, and keep your home and family supplied with lots of pure fresh water, it’s hard to imagine anything better than the WaterBuck Pump, except for maybe a windmill if you have a site suitable for one. Is it the best choice for every situation? No, of course not – but then neither is any other method of pumping water. I am very pleased with our Bison stainless steel water pump and our Dempster cast iron pump, and have no plans to ever replace them. Every situation is different and has different requirements. The WaterBuck fills a need that simply had not been effectively met before its introduction, as far as I can tell.

I have never actually seen the WaterBuck Pump, so this is not a product review – only an introduction to a new product that may be of interest to Southern homesteaders. Now that we’ve gotten that out of the way, let’s look at the WaterBuck Pump. First of all, it is massive – 370 pounds. On one end of the scale are the medium-term water pump solutions made of PVC pipe glued together along with some metal bolts and fasteners. The WaterBuck is on the opposite end of the scale – or even off the scale.

A major factor in reliability is ease of maintenance and ease of repair should that ever be needed. I asked Darren (the developer of the WaterBuck Pump) about this: “Simple maintenance consists of greasing bearings and lubricating chain. The mechanics of my machine are much different than that used for windmills and common hand pumps. The machine has four points of mechanical advantage for ease of operation and maximum discharge. These are light, medium, heavy and heavy duty.”

Although the WaterBuck Pump is a brand new product, the developer of the pump is no newcomer to applying technology to muscle power. Their first product was the WaterBoy Well Bucket. Another unique product is their Pedal Powered PTO, scheduled for release at the end of May, 2013.

You can find more information about the WaterBuck Pump on their website.

Gardening Like Your Life Depends On It

Sevin_IMG_3195
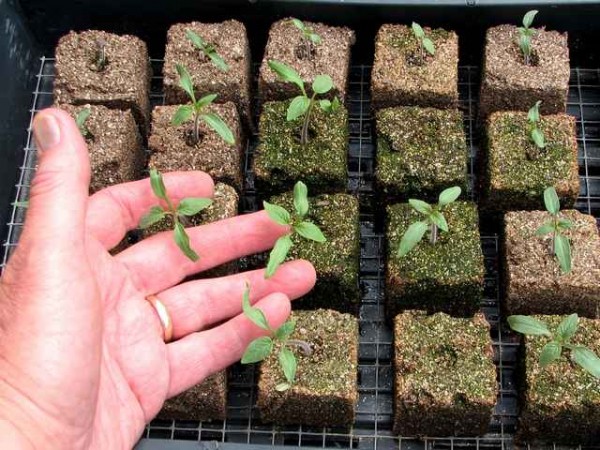
For most of my life, I have viewed my gardening as a thoroughly enjoyable hobby. It was just a natural part of the Southern Agrarian lifestyle that is so much a part of me. My garden has not felt the bitter taste of pesticides, and the fertilizers have been various forms of organic compost. Pest control has been a combination of physically removing bugs, organic methods, and being resigned to the fact that a portion of the crops would be destroyed by pests. It was an enjoyable way to live, and it shielded me from the ancient reason for raising food crops – simple survival. It was – and is – a great and relaxing way to live, but that has partly come to an end.

While I still have not used any pesticides on the garden, I have begun stocking up on Sevin dust and other pesticides. Planting according to a planned schedule now takes a much higher priority than “I’ll try to get to it this weekend.”

The garden has begun to take on the role of Provider of Food … for real. What if my family had to depend on what we grow in the garden and the chicken coop (soon to be joined by some geese)? What if our sole source of water for the plants and the poultry – and for us – were the hand pump well in the back? These are matters that our ancestors took for granted – that was just the way life was. Could it be that way once again? In America? In the Twenty-First Century? Anyone paying attention to world events would have to answer, “yes”.

For now, I continue to abstain from the use of chemical pesticides; however, pesticide-free organic gardening is really more of a luxury than a necessity. If “push comes to shove” and providing my family with good wholesome food depends in large part on what the garden produces, I won’t feel obliged to “share” with the bugs and the birds and the squirrels and the coons, and I won’t be concerned about careful use of pesticides, and I will take a far less relaxed attitude about getting the maximum yield from the garden.

The world is changing rapidly and becoming very unstable. Those who follow the Southern Agrarian philosophy can take great comfort in being close to the land in times like this.

Commercial vs. Homemade

“But of course a commercially formulated growing mixture is going to be better than something I make at home.” How many times have we said, or at least thought, this same thing? I certainly have. The assumption is that what is commercially available has been well researched and thoroughly tested. As much as I try to stay focused on the basic concepts of Southern Agrarianism, the influences of modern-day American society are a powerful force to overcome.

Several weeks ago, I started this year’s garden project – to plant several varieties of tomatoes and decide which variety I will be focusing on. As usual, the seeds were planted in soil blocks. I would be taking careful notes throughout the life of the plants. Unfortunately, a careless mistake a few hours after planting resulted in losing track of which variety is planted in which block. I ended up having to start over. Fortunately (or perhaps unfortunately), I had already prepared a commercial seed starting system for another project. I decided to press that into service for the tomato project.

I ended up with two groups of tomato seeds. They were planted hours apart using seed from the same seed packets. Although it wasn’t part of the original plan, this would be a good opportunity to see how my homemade seed starting mixture and soil blocks compared to a commercial seed starting system, since all other factors were the same.

Commercial seed starting trays and commercial seed starting mixture.

Commercial seed starting trays and commercial seed starting mixture.

VPC seed starting mixture formed into soil blocks.

Homemade seed starting mixture formed into soil blocks.

In this case anyway, homemade clearly wins over commercial. The seedlings in the PVC (Peat/Vermiculite/Compost) mixture and soil blocks are over double the size, have twice the number of leaves, and have much thicker stalks than those started in the commercial mixture. They were watered at the same time and the same rate, and were set side-by-side under the grow lights and timer. Here are the details:

Commercial System:
• Ferry-Morse seed starting plastic trays
• Jiffy Organic Seed Starter Jiffy-Mix

Homemade PVC (Peat/Vermiculite/Compost) mixture:
• 2 parts Peat Moss
• 2 parts medium Vermiculite
• 1 part Mushroom Compost
The Peat Moss and Mushroom Compost were sifted to remove any stick or large pieces.

Summary
I suspect that much of the difference comes from the Mushroom Compost that I added. I suspect that Black Cow composted cow manure would work just as well. Since this was used in soil blocks, the physical consistency was also important, and the compost helped hold it together as well as providing nutrition to the seedlings. The instructions in the commercial mix call for applying fertilizer after the seedlings have been transplanted into the ground. It is clear to me that this is a much better way to start seedlings than using a commercial mixture in the plastic trays. If I were inclined to use the plastic seed starting trays, I would try them using my PVC mixture in the plastic trays rather than the soil blocks, but I see no advantage in using plastic rather than soil blocks.

The PVC mixture is nothing special. It was not the result of careful research – it just seemed like a good mixture adapted from what I currently use in our raised bed garden. I am planning other test mixtures, but that mainly involves improving the handling characteristics of the soil blocks rather than the nutrient levels. Most of the soil block seed starting mixtures I have seen are a lot more involved than my PVC mixture. I wanted something simple to put together using readily available materials.

I have since started another batch of seeds using the PVC mixture and soil blocks, only this time they are carefully identified as to which variety is planted where. I’ll publish the results of my testing later this year.

Carol Deppe’s Seed List

I have written previously about Carol Deppe‘s books – The Resilient Gardener and Breed Your Own Vegetable Varieties. She has a new seed list of varieties she has developed on her own. She is located in the Pacific Northwest, so I suspect that her seeds would probably not be the best choice for those of us down here in Dixie; however, you really need to read the seed descriptions so you can learn her thought process for selecting and developing the varieties in her garden. It also demonstrates the focus she has on matching local conditions to the varieties you select. Let me take this opportunity to again highly recommend both of her books. They should be in the library of anyone interested in growing and developing their own food.

The Resilient Gardener: Food Production and Self-Reliance in Uncertain Times

The Resilient Gardener: Food Production and Self-Reliance in Uncertain Times

Breed Your Own Vegetable Varieties: The Gardener's and Farmer's Guide to Plant Breeding and Seed Saving

Breed Your Own Vegetable Varieties: The Gardener’s and Farmer’s Guide to Plant Breeding and Seed Saving

Mixing The Growing Mixture

In our raised bed garden, we use a growing mixture (not really “soil”) made up of several components, so they must be thoroughly mixed before adding to the garden. Since we’re dealing with a couple hundred pounds in each batch, mixing take a bit of planning. Here’s how we do it:

A large tarp is spread out on the ground. The components are added and mixed one at a time. (Components are shown for illustration only - they are added one at a time.)

A large tarp is spread out on the ground. The components are added and mixed one at a time. (Components are shown on the tarp for illustration only.)

We always start with the Peat Moss. It comes in a compressed bale, so it has to be broken apart until it is all the same consistency. The flat side of a rake is used to spread it out, then just stepping on the chunks breaks it down.

We always start with the Peat Moss. It comes in a compressed bale, so it has to be broken apart until it is all the same consistency. The flat side of a rake is used to spread it out, then just stepping on the chunks breaks it down.

As the rest of the components are added, one at a time, the flat side of an iron rake is used to mix it well before the next component is added. It should be pretty well mixed before the next step of rolling it in the tarp.

At this point, it takes two people. Each holds one corner and then the tarp is folded back onto itself, rolling and thoroughly mixing the components. Go back and forth a couple of times until it is all looks thoroughly mixed.

At this point, it takes two people. Each holds one corner and then the tarp is folded back onto itself, rolling and thoroughly mixing the components. Go back and forth a couple of times until it is all looks thoroughly mixed.

I use a large grain shovel to move the mixture into the raised bed. A 2×4 is dragged across the top to level it out.

Don’t plan on doing more than a couple of batches a day – it takes longer than you might think to do a batch, and it’s pretty heavy work.

Pineapples

pineapple-welcome
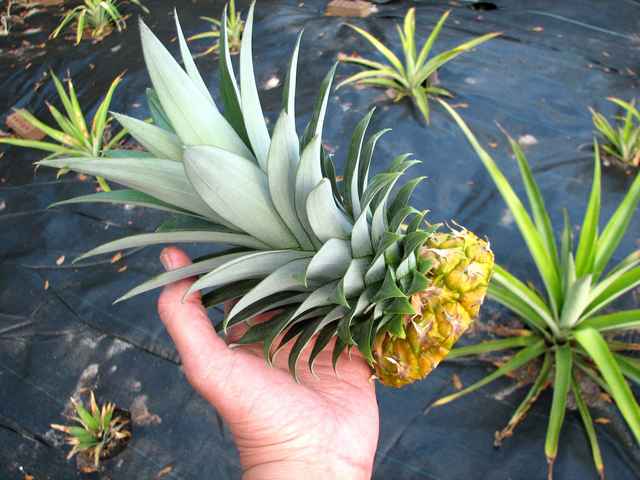
The pineapple has been considered a symbol of hospitality for centuries. If you were to play a word association game, you can bet that “Southern” would be the word that most folks connect to “Hospitality”. Consider making the pineapple a regular part of your home. While it is easy enough to just pick one up at the grocery store, why not save the top and grow your own?
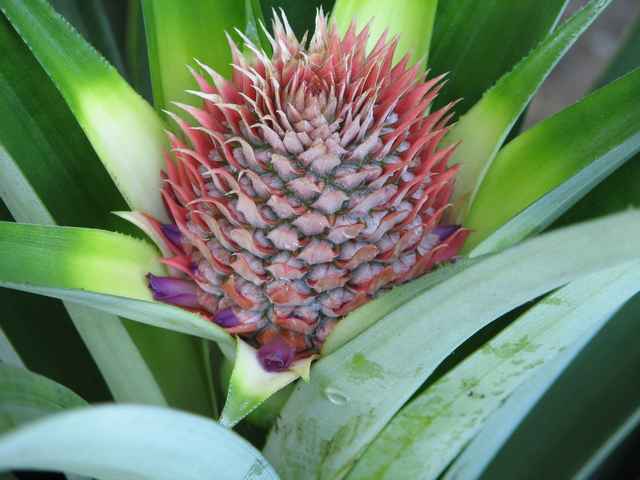
Pineapples grow well in containers or in the ground. Pineapple plants do not tolerate freezing temperatures below 28°F, and temperatures below 60°F and above 90°F may slow plant growth. Pineapples take anywhere from 18 to 24 months from time of planting to time of harvest. We have found that weed control fabric makes the pineapple patch upkeep much easier.

Pineapple bud - August 9

Pineapple bud – August 9

Pineapple bud - August 9

Pineapple bud – August 9

Pineapple almost ready to pick - December 15

Pineapple almost ready to pick – December 15. Wait until it is almost completely yellow to get the sweetest taste, but don’t let it go too long.

Top cutting ready to plant. Note the weed control fabric in the pineapple patch.

Top cutting ready to plant. Note the weed control fabric in the pineapple patch.


For more information on growing pineapples, see this IFAS publication.

In addition, this link includes some of the health benefits of pineapple as well as some recipes.

Save

Monte’s Pumpkin


Monte Poitevint
South Georgia

This picture shows the massive plant in the background, against my chicken pens. I never do anything to cultivate these pumpkins. They seemingly thrive on neglect. We throw our discarded pulp in the compost pile, and every year they come back. They love compost. I’ve tried planting them in my field with little success. My soil just isn’t rich enough for them, I guess. My compost consists of vegetable scraps and lots of chicken and rabbit manure. We got the original seeds from a neighbor years ago when he gave us a pumpkin he had grown (He grows them every year). The species itself is an unknown, but fairly common here in South Georgia. I believe it is an old Indian variety that has been grown here from generation to generation since the first settlers in the area, around 1820. At the auction where I sell my chickens, rabbits and produce, a fellow sets up every fall with a truck load of the same variety. He says he grows his in his field. He must have better soil than I do.

After harvesting, we cut the pumpkins up so as to fit on large pan, throw the pulp onto the compost pile, and bake them in an inch or two of water, skin and all (skin-side up), at 400 degrees till done, about 1 to 1-1/2 hours. We then scoop the baked meat out of the skin and freeze it back to use throughout the year. Good years, when we produce more pumpkins than we can eat, I haul the surplus to the auction and sell them. In a cool, dark space they keep for months.


Do have a photo and story you’d like to share on The Southern Agrarian? If so, send it to stephenmcgehee (at) gmail (dot) com – replacing the “at” and the “dot”, of course. If you don’t receive a reply from me within 24 hours, reply to any post to follow up. Photos should be sent in full resolution. If, for some reason, you do not want your full name used, be sure to let me know how you would like to be identified. Thanks for sharing – that’s how we all learn.

Seminole Pumpkin Experiments

Experimentation is the key to successful gardening. What grows in your area? What part of your area is best for a specific variety? Because variety-X will grow in your USDA Plant Hardiness zone, does that mean that it will grow in your county? in your own garden? in different places in your yard?

On June 28, I planted some Seminole Pumpkin seeds in soil blocks. One week later, they were well-sprouted and had roots extending from the blocks. They were ready to plant. That is about the fastest seed-to-transplant time I have seen.

My objective is to be able to grow Seminole Pumpkin in marginal areas where my primary crops won’t grow. Seminole Pumpkin is a spreading vine that takes up a lot of room. On the other hand, it has some characteristics that make it an ideal plant for gardening when it counts – when you depend on what you can grow to feed your family 1:

  • The fruit can be picked and stored without refrigeration for almost a full year.
  • It was a mainstay of the Florida Indians and early settlers.
  • It will spread over the ground, cover fences, and climb trees.
  • Needs to be fertilized only at planting and requires no protection from insects.
  • Is excellent baked, steamed, or made into a pie.
  • The young fruit is delicious boiled and mashed.
  • The male flowers can be dipped in batter and fried as fritters.
  • It produces continually and roots at the nodes.

For this test, I planted groups of three plants in three different areas. They will be given a single dose of fertilizer and then water as needed. My goal is to find a place that I could plant Seminole Pumpkin and let it take over a large part of otherwise-unproductive land. Since this is an excellent subsistence crop that requires a large area, the ideal would be for it to grow over what is now bare areas and lawn grass.

This is quite late in the year to start Seminole Pumpkin, but it will suffice for this experiment. If this is successful, I will be planting them in the Spring.

Three plants with marker. These were planted in a semi-shaded area between a dogwood tree and an azalea. This is in the front yard in an area that has never been cultivated. The soil is generally moist and organic with lots of competing roots. pH level is probably acid, but has not been tested.

Three plants surrounded by a protective fence. These are planted in an area that previously housed chickens and was actively gardened up until about 8 years ago when nematode infestation made it unusable. The fence protects them from chickens since they still occasionally fly over the fence into this area. The soil is very loose sand.

Three plants with a marker at the edge of a garden area that currently has pineapple, banana, aloe, sweet potato, and New Zealand spinach. This is a newly gardened area that was covered with a mixture of mushroom compost and top soil. It is mostly a low-maintenance test area to see how plants do with only minimal care.


PDF Doc – “The Sturdy Seminole Pumpkin Provides Much Food with Little Effort”, by Julia F. Morton; Pages 137-142; Florida State Horticultural Society, 1975.

Notes:

  1. Florida State Horticultural Society, 1975, page137.

Review of the 7″ Rogue Field Hoe by Prohoe

I don’t use a hoe very much – at least not as much as some people do.  Unlike many people though, I have a deep appreciation for high quality tools and don’t mind paying more for something that, if given reasonable care, my grandchildren will be able to use. The 7″ Rogue Field Hoe by Prohoe is such a tool.

Prohoe Manufacturing is a family owned business in Kansas. The grinding, welding, and sharpening are all done by hand. The steel used in their tools is from recycled agricultural disc blades – and that’s some very tough, high quality steel. They have a heft to them that makes it easier to use than the lightweight, made-in-China hoes that most folks (myself included) own and usually think of as a hoe. I have used mine for several years now, and while my made-in-China hoe has all sorts of small dents and deformations along the edge, my Prohoe is still just as sharp as can be without any significant deformation of the edge. I need to point out that this is very easy soil to hoe and your results may be different, yet the cheap hoe still will not hold an edge where the Prohoe does. As with any tool, cleaning matters. I am almost obsessive about making sure that my garden tools are thoroughly washed before being hung on their rack in the shop.

Prohoe makes a number of different designs, but the one I have is the 70F Field Hoe. I am just as satisfied as can be with my Prohoe field hoe and fully expect my grandchildren to inherit and use this hoe for many years.

Now for the usual disclaimer – I have no financial interest in Prohoe, I received no compensation of any kind for this review, and I paid for my hoe out of my own pocket – every penny of it. I really hate having to write this kind of disclaimer. It wasn’t long ago that men were honorable enough to simply tell the truth without the government having to tell them to do so. The idea of the government telling people to be honest has a delicious bit of irony, doesn’t it?

Keeping Squirrels Out Of The Garden

In the previous post, we looked at how to form hoops to use for supporting a covering over the garden. In this post, we use the hoops to add netting over the garden to keep squirrels from ruining our tomatoes. Obviously, this also keeps birds from damaging the garden.

The netting is made up of 4′ x 50′ rolls of plastic netting that I bought at Lowes Hardware. Because of the size needed for this project, it took five rolls sewn together to make a piece 20′ x 50′. To sew the pieces together, I roll them out on the concrete driveway and sew them together using trot line cord that can be found wherever fishing equipment is sold (at least down here in The South, since it is used for catching catfish). I made a “sewing needle” from a piece of stiff wire and formed an “eye” in one end. Bend a bit of a curve in it to make it easier to use.

Each hoop consists of:
• 10 section of 1/2″ EMT (galvanized metal electrical conduit) bent into a 4′ radius
• Two 5′ sections of thin-wall PVC pipe slipped over each end of the metal conduit. There is a 3″ overlap on each end.
• Duct tape at each joint to keep it from slipping.

Try to keep all hoops uniform in size and shape. When the hoops are assembled, any differences will become very noticeable and make the finished structure look very sloppy.

The finished structure includes three sections of PVC pipe cable-tied to the sides and the top. This provides support for the covering and makes the whole structure strong enough to hold it together. When it is time to disassemble the structure, just cut the cable ties and the whole thing can be easily stored in a fairly small space.

Side view of the hoops and netting covering the tomatoes

End view. Squash is in the foreground.

There are three sections of PVC pipe that run the length of the frame - one on each side and one along the top.

It is important to keep the lengths of PVC pipe on the INSIDE of the hoops. Otherwise, the covering will hang up on it and be very difficult to work with. For the same reason, the cable tie ends must also point toward the inside.

« Older posts Newer posts »