Southern Agrarianism and the culture of the Old South

Tag: garden (Page 1 of 4)

More Than Just Food

There is a temptation to look at a vegetable garden as a home-grown food factory, where efficiency is the driving factor. I suspect that most of us have gone through that phase. We try to squeeze the most production out of every last bit of garden space – if it doesn’t put food on the table, then it’s given the same status as a weed.

We need to change that. We need to remember why we grow things, and why we feel a deep connection with the land and with our people. Southern Agrarianism is very much a cultural matter, and our culture has always placed a high value on beauty. We see it in the art, the architecture, and the music of our European heritage. It is an important part of who we are. To that end, we need to remember that there is an aesthetic, almost spiritual, aspect to raising our own food. I make it a point to try to make my garden areas as visually attractive as I can. I plant flowers (usually Zinnias) among the vegetables, both for cut flowers and to attract pollinators into the garden. The garden fence is covered with both bush roses and climbing roses (Old Blush, a vintage rose that requires virtually no care).

A garden is to enjoy – not just to provide our families with fresh eggs and healthy vegetables. It is there to show our children and grandchildren that food does not originate wrapped in cellophane and Styrofoam packaging. It is a very real part of home schooling – no matter where the formal lessons are held.

A garden doesn’t have to look like something from a magazine cover to be beautiful – no garden looks perfectly groomed at all times. Just remember that it is there to be enjoyed, and beauty makes it enjoyable.


This is a 90-second tour of our little one-acre homestead that I put together this past Friday.

Making the Best of it

The Tolkien quote above is one of my favorites, and it is certainly applicable to the incredible instability in the world today. Life happens, and for the most part, we are just along for the ride.

What matters is what we do with the circumstances we find ourselves in. As for me, I choose to be a Southern gentleman – regardless of the situation. It is my choice, what I do with the current situation. That really came into focus as my wife and I walked through our local Publix grocery store yesterday. The employees were frantically trying to stock the shelves while answering questions about empty shelves, the cashiers were doing their best to explain rationing to customers, and the aisles were crowded. Unlike stories I’ve heard of fights over the last roll of toilet paper, people were calm and polite, but the tension was palpable. It is my choice, so I choose to go out of my way to smile, say “thank you” wherever appropriate, and tell a couple of the employees that I appreciate what they’re doing and what they are going through. It makes a difference, both to them and to me. Another benefit is that it gives us a feeling of control at a time when everything seems to be spinning out of control.

How will we use the additional time spent at home? I hope we think it over carefully and look at it as an opportunity rather than a restriction. As for me, I am lining up a selection of books that I’ve been wanting to read. Not staring at a computer screen, but real paper and ink books – all while enjoying a comfortable chair and a cup of Earl Grey tea. I have a garden that needs tending and planning for next year. The chickens will need food and water, and their eggs need gathering. The blossoms on the peach trees mean there will be pruning to be done, and peaches to harvest.

What is happening right now is something that we will remember for the rest of our lives, and we will recount these times to those too young to remember. Make sure that your memories are good ones and that your regrets are few.

The best example I can think of at the moment, is the memory of one of the recent hurricanes that swept through here, leaving us without power in a house filled with three generations of family. Our daughter-in-law brought her harp to our house, and played it by candlelight and battery lantern. You could almost feel the calm as the hurricane raged outside. Those are the types of memories I want to carry with me from these chaotic times.

Relax. This is going to take a while.

Our daughter-in-law played the harp for us, bring a sense of calm in the middle a hurricane.

Transplanting Seedlings

Red cabbage and Romaine Lettuce seedlings ready for transplanting


While direct seeding is probably the most common way of starting a garden, there are some major advantages to starting your seedlings in a tray and then transplanting them once they have gotten to the right stage.

  • Very little seed is wasted.
  • Thinning can be done while comfortably sitting at a bench or table.
  • By starting Spring crops before the last killing frost, harvest comes several weeks earlier.
  • Beat the bugs. Insect pests arrive when plenty of food is normally available to them. By planting earlier than normal, you can harvest while pest pressure is still low.
  • Aesthetics – There is just something very rewarding about looking out over your garden and seeing full, straight, evenly spaced rows. It is generally easier with transplants than with direct seeding.

Let’s look at the process, step by step:

Seed tray, seeds, and soil. It doesn’t get much simpler than that.


Fill the seed tray with seed starting soil. Unless you’ve got a very large garden, you may find that just getting pre-mixed seed starting soil is best. Make sure that the soil is moist before adding seeds! Press it in firmly, then smooth it off. Use something to make the hole to receive the seeds at the proper depth. I find that the end of a “Sharpie” marker works well for most seeds.


Seeds will sprout, then grow under lights until ready to transplant. Keep the plants close to the light source. I use a timer to give them about 16 hours of light per day. Experiment to see what works best for you. Check them regularly and don’t let them dry out.


When it’s time to transplant, allow the seedlings to get fairly dry so that they are easier to work with. Use a dowel about the size of the drain holes to push the seedlings out and lay them in a tray for easier handling. The flat end of a cheap ballpoint pen works pretty well. This is where you’ll be glad you packed the soil in the cells nice and firmly.


The seed trays have grooves in the sides to help guide the roots straight downward rather than allowing them to wrap around into a ball.


I use a knife to open up a hole for the transplant, and a “garden scooter” that I found at a yard sale to make it easier.


Nice straight, even rows of plants is a beautiful sight. Be sure to water it well immediately after planting and for the next several days until the roots get better established.


A few more notes:

  • My standard spacing for most crops is 12″ between plants, and 24″ between rows. Larger plants, such as tomatoes and eggplant, are spaced wider.
  • The seed trays I use are available from Hoss Tools, which is where I get most of my garden tools. These are the 162 cell trays with the Heavy Duty Bottom Trays. They are not cheap, but they are incredibly rugged, and will probably last long enough to be passed down to your grandchildren if given reasonable care. The Bottom Trays may seem like just an added expense, but they are very helpful and well worth it. If you’re just getting started, you might want to start off with another cheaper type of tray; eventually, though, I have no doubt that you’ll end up getting some of these Hoss Tool trays.
  • Once the seeds have sprouted and sent down their roots, you can water from the bottom up. This is where the Heavy Duty Bottom Trays come in handy. Make sure that you water from the top until all the seeds have sprouted and put down roots before you start bottom watering.
  • Be sure to read up on what you will be planting. Not all plants will tolerate transplanting very well, so they work better if direct seeded.  Some examples of plants that generally do NOT do well with transplanting are beans, corn, and okra. I have done reasonably well transplanting even those plants that are not recommended for it, but as a general rule, follow the planting guidelines unless you just want to experiment (which I highly recommend!).
  • I try to always plant a few “spares” between the rows, or somewhere else in the garden. These are used to replace the ones that don’t survive the transplanting – I like neat, full rows.
  • I mentioned earlier to make sure that the soil is damp before adding it to the trays. If it is too dry, surface tension will not allow the water to penetrate the dry soil, and your seedlings will shrivel and die for lack of water – even though you are “watering” them regularly (see photo below). You want the soil to be just damp enough that you can squeeze it into a ball and have it stay in that shape. You might be able to squeeze a drop or two of water out of it, but you don’t want it much wetter than that.

This is what happens when the soil going into the trays is too dry. Surface tension prevents the water from going into the soil and reaching the roots.


Just a reminder – links on this site are NOT “affiliate” links, nor is there any type of financial incentive or compensation for anything mentioned here. If it’s mentioned, it’s because I use it myself. If I don’t like something, I’ll make that clear also. I do this because I enjoy writing these posts, and I receive no monetary benefit of any sort for what I write.

Tool Review – SoilSaver Composter

Composting is pretty much standard for anyone with any kind of garden. It’s part of the natural cycle – the soil provides the nourishment that provides the crops, and we then return what we don’t use back to the soil, along with whatever other organic matter we can add. I’ve gone through several different types of composting systems, but my current one – the SoilSaver composter – does just what a composter is designed to do, and it does it well.

What I’ve used previously
ꔷ The old school standard that our family used when I was growing up was just called a “Tomato Ring”. It was a piece of fence in a circle about three or four feet in diameter that held leaves and whatever else was available. They worked, but only if you kept it watered and turned over; it was a rather labor-intensive system and was too quick to dry out.
ꔷ Next was a rotating drum system. In theory, this should be ideal – but it wasn’t. After numerous attempts, I found that every single batch would become anaerobic – it was not getting enough air mixed in, and it would become a slimy, putrid mess. A rotating drum with enough ventilation would apparently be too porous and lose its contents when being turned.
ꔷ After that was a round plastic composter that had an open bottom. This one worked well. The open bottom prevented water from accumulating, while allowing it to remain wet enough to decompose. It worked great until the side split and it had to be scrapped.

The SoilSaver (Amazon link) is what I am using now, and have been for the past three months; based on that, I added a second one a month ago. The SoilSaver is well-designed and sturdy when properly assembled and set up. One of the keys to “properly assembled” is following the instructions when it says that it must be set up on a flat level surface. The first time I set one up, the ground was not flat enough, and the top would not fit on very well. Removing the contents, leveling the ground beneath it (i.e., actually reading and following the instructions), then filling it back up made all the difference. The top now fits neatly and closes securely.

Nothing is perfect, and the SoilSaver is no exception. It is assembled with plastic nuts and bolts, and it comes with a wrench to tighten them down. It doesn’t take much to over-torque and strip them. They really ought to include a few extra of the plastic nuts and bolts – it couldn’t cost more than a penny or two extra. That’s it – the only thing I could find to criticize about it. Assembly is fast and easy, and it is designed to make assembly pretty much foolproof. When the sides are assembled, it is rather unstable when carrying it, so it’s best to put it together pretty close to where you’ll be using it.

While we’re on the topic of compost bins, a “must have” tool is the Yard Butler Compost Aerator (Amazon link). I first learned of this tool after seeing one being used at a demonstration garden at our county Ag Center. You’ve got to keep things mixed up and aerated, and this tool makes it fast and easy. I’ve read some reviews complaining that, after a while, the “wings” get rusted in place and it no longer works. Nonsense. Any tool needs to be kept clean and oiled if you expect it to work well and to last, and this is no exception. I keep mine in the tool shed when I’m not using it, and I always wash it off when I’m finished with it, and if I see any rust starting to form, a drop of oil is all it takes. As my father liked to say, “Take care of your tools, and they’ll take care of you.” I have been using mine regularly for a number of years, and it works just as well now as when I first got it. Highly recommended.

What comes in the box.

Yard Butler Compost Aerator.

Wasteland To Garden

November 2019

March 2017 – New garden area with cow manure added, and part of the peat moss added. Note the barren soil in the foreground – even weeds had a hard time growing here.


Can wasteland that will just barely support a few weeds, be turned into productive garden space? Two and a half years ago, I set about to answer that question.


The Wasteland to Garden experiment is going to take longer than I imagined it would, but in the end, I should end up with an additional 600 square feet of productive garden space where I used to just have little more than white sand. If this continues to improve, it will demonstrate that anyone can have a nice garden if they are willing to put in the time, work, and resources to make it happen.

The main problem was that there was almost no organic matter in that area. Rain water would just run right through with nothing to absorb and hold it, leaving it dry shortly after even a good rain. In addition, with nothing to feed earthworms and microorganisms, it was not part of the living ecosystem of the soil that plants depend on. Mixing in large quantities of organic matter is key to making that soil come alive, but it takes more than that. It takes time – time for the living part of the soil to reproduce and become established.

I don’t know this as fact, but I suspect that the physical makeup of the original soil is such that this area will need to be regularly used as garden area in order to keep the level of organic matter up and to replace the nutrients that get washed down below the root zone.

Below this post is the original post from March 2017. Some of the changes since the original post:

  • The fig tree (the near-leafless branches in the upper left part of the 2017 photo) was dug up and replanted in another area and is doing far better.
  • The size was expanded to 14′ x 44′ (from 11′ x 19′)
  • In March 2019, a layer of compost about 2″ deep was added and tilled in.
  • Several gardens were attempted, including a Three Sisters garden with corn, beans, and Seminole Pumpkin. Results were less than impressive, but still a huge improvement over what it was two and a half years ago. Everything grown was tilled into the soil at the end of its season.
  • Sweet potatoes (Centennial) were added at one end of the garden, mainly because I had some that needed to be relocated. They have done very well there.
  • Ground cover fabric was added to surround the garden area to help keep weeds from encroaching from the sides. It is held in place with weights, rather than being staked, so that it can be tilled right up to the edge on the garden side, and mowed right up to the edge on the grass side.
  • A few weeks ago, I added one pallet load (65 cubic feet) of top soil, and tilled it in (photo above). About 30 cubic feet of top soil had been added a month earlier.
  • Earlier this week, I plowed one furrow using a Hoss Wheel Hoe with plow attachment, and planted some potatoes that had been bought for eating, but sprouted in the pantry.

In the next few weeks, when seed potatoes are available locally, I will plant several rows of Yukon Gold. I will probably be starting some romaine lettuce and Golden Acre cabbage in seed trays and then transplanting them. This will be the first “full” garden planted in this test plot.

At this point, it is clear to me that even the most barren, sterile land can be turned into productive land – IF enough organic matter is added. Another important point is that this takes time – not just in hours of work, but years to build up the microorganisms that turn sterile dirt into living soil. I am starting to really understand that good soil is much more than simply chemical and physical components, but rather a complex living ecosystem that must be carefully nourished over time.

Another important lesson learned was that, while getting compost may be a bit cheaper by the dump truck load, the job isn’t finished until it is spread. Evenly distributing a dump truck load of compost required a tractor, and still it was not as even as it should be. Getting top soil in bags made it much simpler to evenly spread it across the garden.


Southern Agrarianism is about a deep appreciation for the soil. It is about nourishing and caring for that soil and the understanding that, with careful stewardship and work, that soil will provide our families with fresh, wholesome food, and our children will truly understand where food comes from. It is sad that so many urban people have no real understanding of what it takes to put food on their plate – an understanding that is deep in the hearts of Southern Agrarians.


Compost by the truck load may be a bit less expensive, but much harder to spread evenly. Part of this had to be moved from the main garden to the test area. Lesson learned.


Original post from March 2017:

(Photos omitted)

As much as I expanded my garden over the past several months, I still ran out of room. The solution? Turn an unused part of the backyard into garden. The problem is that this unused part of the yard is so infertile that even weeds have a hard time growing there. That makes this more of an experiment than just a routine garden project. Here’s what I’ve done:

  1. Used the BCS Two-wheel Tractor with tiller attachment to rototill the area. I went over it twice in both directions. I raked and picked up the assorted roots and weeds (and a beautiful piece of heavy green glass from some long-ago bottle).
  2. Watered it very heavily. In addition to adding much-needed moisture, this greatly improves the ability to work the soil.
  3. The next day, I added cow manure and peat moss. It was mixed in using a Mantis tiller with the tines reversed so that it just mixes things up without digging deeply.
  4. More watering, with the ducks “helping”.
  5. Marked out the rows and planted Seminole Pumpkin seeds.


I had planted some Seminole Pumpkin seeds in the main garden area, but decided I’d rather put more okra in. Seminole Pumpkin can take up a huge amount of space as it spreads out. It won’t hurt if it spreads out in this new garden area, but it would have shaded out other plants in the main garden area.

As I said, this is really an experiment to see what it takes to turn a small (11′ x 19′) patch of barren ground into a fertile garden. We’ll take another look at it later in the year. In the mean time, the main garden is starting to have green where there was once only dirt.

A lesson to be learned here is that if I can turn this piece of barren sand into a productive garden, then anyone can find a place to start one.

Save

The Southern Agrarian Last Ditch List

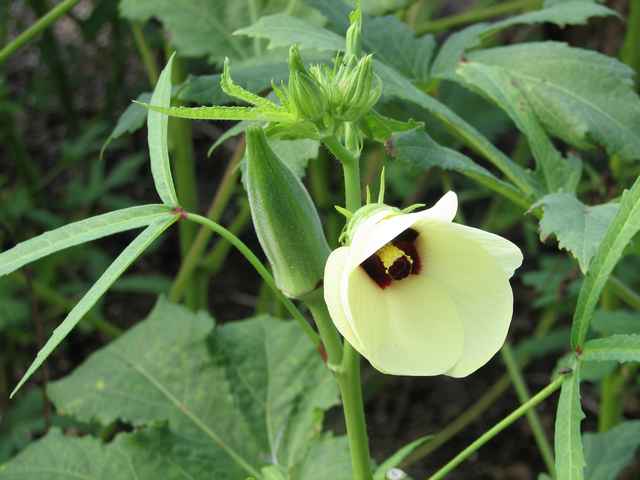
Okra pods and flower

Most of us garden primarily for pleasure. It’s what we do because – well, because we are Southern Agrarians. Yes, what we grow ends up on our table or given to friends and neighbors; however, what our garden produces generally does not determine whether we eat or starve.

But what if it did? What if our very fragile system were to collapse leaving the grocery store shelves empty and the streets too dangerous to venture out in? Part of Southern Agrarianism is being independent of that complex system, so this is very much a topic for discussion.

My garden tends to be planned more around what we enjoy eating and growing rather than for maximizing food production when lives depend on it. The Last Ditch List is what I would be planting if lives did depend on it.


The Southern Agrarian Last Ditch List

Sweet Potatoes (Centennial)
Incredibly easy to grow; I’m still growing them from the very first slips that I got about eight years ago. I keep moving them around to avoid soil-borne pests and diseases, and they will take transplanting without any problem.
ꔷ The taste is delicious
ꔷ High in nutritional value
ꔷ Will last for months if stored in a cool, dark place
ꔷ The leaves are edible

Okra (Clemson Spineless)
ꔷ Continuous production through hot weather
ꔷ Very resistant to disease and pest
ꔷ Each plant will produce one or two edible pods about every two to three days
ꔷ Easy to save seeds
ꔷ Delicious when fried

Eggplant (Florida Highbush)
ꔷ Highly productive through hot weather
ꔷ Easily prepared and makes a good, filling meal
ꔷ Minimal problems from disease or pests
ꔷ Relatively easy to save seeds if you know the technique
ꔷ Should plant a fairly large number to maintain genetic diversity in seeds

Seminole Pumpkin
ꔷ Fruit can last up to a full year when properly stored
ꔷ Almost impervious to disease or pests
ꔷ Huge vines that drop roots along the way making the plant very resilient and able to thrive on relatively poor ground
ꔷ Lots of organic matter at the end of the season to keep the ground rich
ꔷ Needs good care and lots of water to get started; once established, requires almost no care

Collards (Georgia Southern)
ꔷ Winter crop
ꔷ Other greens will not reliably produce seeds in this area


Second Tier crops

These are ones that I am still working with but don’t have enough experience yet to put them on the Last Ditch List. Nothing other than lack of a well established track record keeps me from putting them on the Last Ditch List.

Potatoes (Yukon Gold)
This is only my second time planting these, but all indications are that they should make the Last Ditch List in the next year or two.

Squash (Tromboncino)
The variety makes all the difference. I have given up on the more typical yellow squash; bugs have destroyed them every single time I have tried. Tromboncino, on the other hand, is highly resistant to pests due to its tough outer skin. The fruit is pale green, long and thin, and grows on a vine. I have them growing along a fence.


Not On The List

These are crops that I grow now, but they don’t meet the criteria for inclusion on the Last Ditch List.

Beans (Kentucky Wonder or Blue Lake) – Too many poor results. Sometimes I get a good crop, and other times it’s a poor crop. Inconsistent. May be moved to the Last Ditch List once I learn more, but not yet. Good potential once I learn more.

Corn (Reid’s Yellow Dent) – Low yield for the amount of space it takes up. Heavy drain on the garden soil. If any crops would be available for purchase following a collapse, it would be grains. They are well suited for large scale, highly mechanized farming, and they transport and store well. I keep some seeds on hand for use in corn meal or for chicken feed – just in case.

Tomatoes (Homestead 24) – Too easily damaged by bugs or disease or blossom end rot. They stop producing when the weather gets hot.

Peppers (Carolina Wonder) – Susceptibility to Blossom End Rot keeps peppers off the list. If I can get the calcium deficiency solved, this might be moved to the Last Ditch List.


Final Notes

Vegetable gardening is very location-dependent. This Last Ditch List is what works for me here in north central Florida. There is a really good chance that your Last Ditch List would be different. Maybe very different. Perhaps the most value from this list is in the criteria – why I chose what I did for this list.

What is on your Last Ditch List – and why?

Learning from Failure – Blossom End Rot

When I started my garden this year, I knew that I needed to add calcium to the soil – or at least I was pretty sure that it was needed. Now that things are ripening, it turns out that I was right. The tomatoes and peppers are both on track to be a near-total loss due to blossom end rot. I have beautiful red tomatoes, but when they are turned over, what you see is a big black spot of rotting tomato. The peppers have a rotten brown spot on the end.

I had tried to locate a local source for pelletized gypsum, but couldn’t. I should have looked harder. I could have used a special tomato fertilizer, but that is sold in small containers that would have cost far too much to fertilize the whole garden. I have since found a source that is about an hour away, and will be stocking up on it for next year.

The key points:

  • Never assume that things will always turn out the way they are supposed to turn out. I’ve had great luck with both tomatoes and peppers, but in different soil.
  • Know what will grow well in your garden as it is now. If you’re depending on what your garden produces, don’t waste space on “nice to have” crops. Stick with what you know will work.
  • It all comes from the soil. If it needs something, get it and add it.

Tools For The Garden

Gardening can be very time-consuming, hard work – unless you have the right tools for the job. The right tools can make the work fast and easy, and they can allow someone to reasonably produce enough food to feed their family where it would not be possible without them.

The top photo shows my current collection of manual garden tools. This does not include the BCS two-wheel tractor and implements that are stored in another area. I tend to collect garden tools like some folks collect guns – better to have it and not need it than to need it and not have it. One can never have too many garden tools. I even have a broad fork – a beast of a tool that I might even need some day. In future posts, we’ll look at some of the more interesting tools in my shed.

The second photo shows two extremes in tools. One item is a Rogue Field Hoe (reviewed here) – a great example of a high quality tool that should last a lifetime or more. The crude stick with a metal spike driven through it is not an ancient relic from an archaeological site or something sold to tourists. It is a hand hoe that is in routine use today in Africa. Specifically, this one was purchased at a village market in Sierra Leone, West Africa by missionaries there that I work with. This could correctly be called state of the art technology in most of Africa today. Yes, there are certainly tractors and modern tools in use there also; however, those are imported. When it comes to tools made by the locals, this pretty much says it all. There are some lessons to be learned in this.

Western hoe and African hoe – both manufactured about the same time, and both routinely used in their respective areas.

OK. What’s the point of this post? Ask yourself how you would produce enough food to feed yourself and your family if you had to work the soil to feed them. Stored food doesn’t count – that eventually runs out. Power equipment is great, but it doesn’t count either – fuel very quickly runs out. What you’re left with is muscle powered tools. Most of the world will reply with rolled eyes and a smirk. “It couldn’t happen here” they would say. Perhaps they are right. I certainly hope they are right; however, I’m not going to bet my family’s life on it. Do you?

One Acre Makeover

At some point last year, it became clear to me that I needed to make some major changes here on our one acre homestead. If your place is already exactly what it should be, then you might want to skip reading this post. Otherwise, perhaps you’ll find a bit of inspiration here.

The Problem:

  • The garden was not set up for efficiently maintaining it. As the years start adding up for me, making it easy to maintain becomes more important.
  • The garden irrigation system had underground pipes through the garden area, and that’s a really bad idea when using a powerful roto-tiller. Running over a pipe creates quite an interesting fountain in the garden.
  • The trees that provided some shade were old water oaks. In this part of the country, they are really more like giant weeds. They don’t produce anything and they tend to rot from the inside out (just as nations and cultures do), and it goes unnoticed until a storm comes along and blows it over – sometimes taking other things with it.
  • The bee hives that I set in the garden were OK until the bees got in a cranky mood at the same time that I needed to work in the garden. Keeping bees means you’re going to get stung once in a while, but you never really get used to it no matter what anyone says.


The Solution:

  • The patchwork garden design became a single rectangular block. The duck pen, the bee hives, the bananas, and the pineapple patch – gone. The duck pen was moved back out of the garden area, the pineapple plants were transplanted to a single row along the perimeter fence, the banana plants cut down and dug up, and the bee hives were moved away from the garden.
  • The irrigation system now consists of two rows of overlapping sprinklers along the sides such that every part of the garden is covered by at least two sprinklers. All the irrigation pipe and one electrical conduit were removed from the garden area.
  • All of the oaks were removed. It wasn’t cheap, but it takes heavy equipment and it needed to be done. With the yard now opened up, I planted peaches, apples, pears, pomegranates, persimmons, figs, avocado, and plums. I would rather spend my time here watching the young fruit trees grow up than watching the old water oaks rot and die. At this stage of life, watching the young grow up is one of life’s greatest joys. Think grandchildren.
  • The bee hives were moved to the side of the house. It is an area that is otherwise unused, and there are no doors on that end of the house. The bees are happy and so are we. I also reduced the number of hives from ten down to three – plenty enough for pollination and some honey.


Future posts will detail things like planting the fruit trees, the bee hives, etc. For now, I’ll let the pictures tell the story.


The Water Oaks come out


The buried pipe comes out


Banana plants are next to be removed


Stakes mark where a row of fruit trees will be planted


Fruit trees being planted

Grow What You DON’T Eat

Cotton from the garden

Fruits and vegetables are what most folks think of when they think of gardening. There are, however, other things that are good to grow, but are not for the dinner table. We’ll go into each of these in more detail in future posts, but I wanted to get you thinking about what non-food plants you might want to try growing.

  • Winter Rye – Used to add organic matter to the soil. It also helps control the nematode population, protects the top surface layer of soil, shades out weeds. I had my garden planted in this over the past Winter. It was used as a calibration crop to compare different areas of the garden and to add organic matter to the soil when it was tilled under in the Spring.
  • Cotton – Mainly just a fun crop for most of us. On the other hand, it is a vital component in society and open-pollinated seed stock must be preserved. Each year, I grow a few cotton plants just to keep a supply of seeds and to show visitors where their clothing comes from. The variety I grow – Red Foliated White – is a beautiful plant. The cotton yield from this open-pollinated variety is nowhere near as high as what commercially-grown cotton yields, but I’m not interested in growing commercial hybrids.
  • Luffa Gourd – Sold in stores as Luffa Sponges, they are great for scrubbing in the shower. They also make a great utility scrubber. The very young fruit and flowers can be eaten, but I’ve never tried eating it. They produce numerous beautiful yellow flowers, so we have them planted along the front fence this year.
  • Velvet Bean – This vine was a very commonly grown plant along with corn in the days before cheap fertilizer. It fixes Nitrogen in the soil, supports tall plants in high winds, and shades out weeds with its kudzu-like growth pattern. An interesting side note is its use as a treatment for Parkinson’s Disease.
  • Gourds – Used to make bird houses, water dippers, crafts, and other items.
  • Moringa – This one is a sort-of-food plant (actually a tree). High in vitamins and minerals, the leaves are dried, ground into a powder, then used as a food supplement. This is a very fast growing tree and is often kept pruned to bush size to make harvesting easier.
  • Marigolds – In addition to it’s beautiful flowers, it repels insects when planted among other plants.

What have you grown that isn’t for the dinner table?

Save

Save

« Older posts