Southern Agrarianism and the culture of the Old South

Author: Stephen Clay McGehee (Page 8 of 14)

Born-Again Christian, Grandfather, husband, business owner, Southerner, aspiring Southern Gentleman. Publisher of The Southern Agrarian blog. President/Owner of Adjutant Workshop, Inc., Vice President - Gather The Fragments Bible Mission, Inc. (Sierra Leone, West Africa), Quartermaster and Webmaster - Military Order of The Stars and Bars, Kentucky Colonel.

Gardening Like Your Life Depends On It

Sevin_IMG_3195For most of my life, I have viewed my gardening as a thoroughly enjoyable hobby. It was just a natural part of the Southern Agrarian lifestyle that is so much a part of me. My garden has not felt the bitter taste of pesticides, and the fertilizers have been various forms of organic compost. Pest control has been a combination of physically removing bugs, organic methods, and being resigned to the fact that a portion of the crops would be destroyed by pests. It was an enjoyable way to live, and it shielded me from the ancient reason for raising food crops – simple survival. It was – and is – a great and relaxing way to live, but that has partly come to an end.

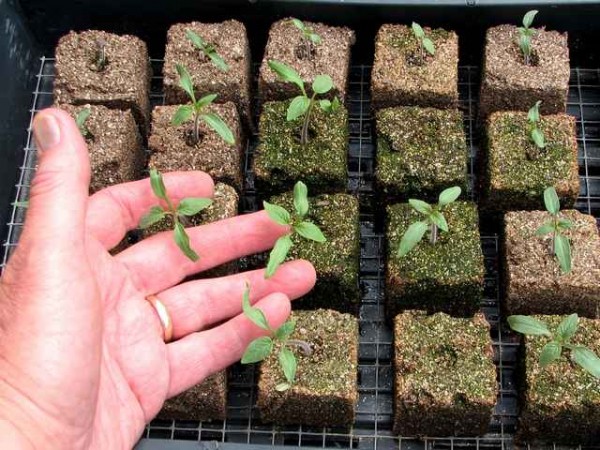
While I still have not used any pesticides on the garden, I have begun stocking up on Sevin dust and other pesticides. Planting according to a planned schedule now takes a much higher priority than “I’ll try to get to it this weekend.”

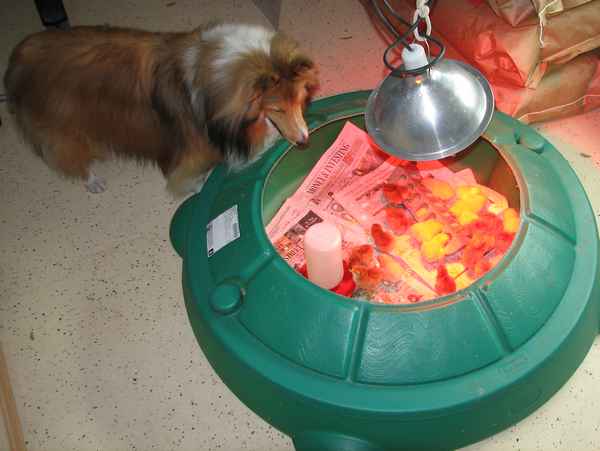
The garden has begun to take on the role of Provider of Food … for real. What if my family had to depend on what we grow in the garden and the chicken coop (soon to be joined by some geese)? What if our sole source of water for the plants and the poultry – and for us – were the hand pump well in the back? These are matters that our ancestors took for granted – that was just the way life was. Could it be that way once again? In America? In the Twenty-First Century? Anyone paying attention to world events would have to answer, “yes”.

For now, I continue to abstain from the use of chemical pesticides; however, pesticide-free organic gardening is really more of a luxury than a necessity. If “push comes to shove” and providing my family with good wholesome food depends in large part on what the garden produces, I won’t feel obliged to “share” with the bugs and the birds and the squirrels and the coons, and I won’t be concerned about careful use of pesticides, and I will take a far less relaxed attitude about getting the maximum yield from the garden.

The world is changing rapidly and becoming very unstable. Those who follow the Southern Agrarian philosophy can take great comfort in being close to the land in times like this.

Commercial vs. Homemade

“But of course a commercially formulated growing mixture is going to be better than something I make at home.” How many times have we said, or at least thought, this same thing? I certainly have. The assumption is that what is commercially available has been well researched and thoroughly tested. As much as I try to stay focused on the basic concepts of Southern Agrarianism, the influences of modern-day American society are a powerful force to overcome.

Several weeks ago, I started this year’s garden project – to plant several varieties of tomatoes and decide which variety I will be focusing on. As usual, the seeds were planted in soil blocks. I would be taking careful notes throughout the life of the plants. Unfortunately, a careless mistake a few hours after planting resulted in losing track of which variety is planted in which block. I ended up having to start over. Fortunately (or perhaps unfortunately), I had already prepared a commercial seed starting system for another project. I decided to press that into service for the tomato project.

I ended up with two groups of tomato seeds. They were planted hours apart using seed from the same seed packets. Although it wasn’t part of the original plan, this would be a good opportunity to see how my homemade seed starting mixture and soil blocks compared to a commercial seed starting system, since all other factors were the same.

Commercial seed starting trays and commercial seed starting mixture.

Commercial seed starting trays and commercial seed starting mixture.

VPC seed starting mixture formed into soil blocks.

Homemade seed starting mixture formed into soil blocks.

In this case anyway, homemade clearly wins over commercial. The seedlings in the PVC (Peat/Vermiculite/Compost) mixture and soil blocks are over double the size, have twice the number of leaves, and have much thicker stalks than those started in the commercial mixture. They were watered at the same time and the same rate, and were set side-by-side under the grow lights and timer. Here are the details:

Commercial System:
• Ferry-Morse seed starting plastic trays
• Jiffy Organic Seed Starter Jiffy-Mix

Homemade PVC (Peat/Vermiculite/Compost) mixture:
• 2 parts Peat Moss
• 2 parts medium Vermiculite
• 1 part Mushroom Compost
The Peat Moss and Mushroom Compost were sifted to remove any stick or large pieces.

Summary
I suspect that much of the difference comes from the Mushroom Compost that I added. I suspect that Black Cow composted cow manure would work just as well. Since this was used in soil blocks, the physical consistency was also important, and the compost helped hold it together as well as providing nutrition to the seedlings. The instructions in the commercial mix call for applying fertilizer after the seedlings have been transplanted into the ground. It is clear to me that this is a much better way to start seedlings than using a commercial mixture in the plastic trays. If I were inclined to use the plastic seed starting trays, I would try them using my PVC mixture in the plastic trays rather than the soil blocks, but I see no advantage in using plastic rather than soil blocks.

The PVC mixture is nothing special. It was not the result of careful research – it just seemed like a good mixture adapted from what I currently use in our raised bed garden. I am planning other test mixtures, but that mainly involves improving the handling characteristics of the soil blocks rather than the nutrient levels. Most of the soil block seed starting mixtures I have seen are a lot more involved than my PVC mixture. I wanted something simple to put together using readily available materials.

I have since started another batch of seeds using the PVC mixture and soil blocks, only this time they are carefully identified as to which variety is planted where. I’ll publish the results of my testing later this year.

Carol Deppe’s Seed List

I have written previously about Carol Deppe‘s books – The Resilient Gardener and Breed Your Own Vegetable Varieties. She has a new seed list of varieties she has developed on her own. She is located in the Pacific Northwest, so I suspect that her seeds would probably not be the best choice for those of us down here in Dixie; however, you really need to read the seed descriptions so you can learn her thought process for selecting and developing the varieties in her garden. It also demonstrates the focus she has on matching local conditions to the varieties you select. Let me take this opportunity to again highly recommend both of her books. They should be in the library of anyone interested in growing and developing their own food.

The Resilient Gardener: Food Production and Self-Reliance in Uncertain Times

The Resilient Gardener: Food Production and Self-Reliance in Uncertain Times

Breed Your Own Vegetable Varieties: The Gardener's and Farmer's Guide to Plant Breeding and Seed Saving

Breed Your Own Vegetable Varieties: The Gardener’s and Farmer’s Guide to Plant Breeding and Seed Saving

Mixing The Growing Mixture

In our raised bed garden, we use a growing mixture (not really “soil”) made up of several components, so they must be thoroughly mixed before adding to the garden. Since we’re dealing with a couple hundred pounds in each batch, mixing take a bit of planning. Here’s how we do it:

A large tarp is spread out on the ground. The components are added and mixed one at a time. (Components are shown for illustration only - they are added one at a time.)

A large tarp is spread out on the ground. The components are added and mixed one at a time. (Components are shown on the tarp for illustration only.)

We always start with the Peat Moss. It comes in a compressed bale, so it has to be broken apart until it is all the same consistency. The flat side of a rake is used to spread it out, then just stepping on the chunks breaks it down.

We always start with the Peat Moss. It comes in a compressed bale, so it has to be broken apart until it is all the same consistency. The flat side of a rake is used to spread it out, then just stepping on the chunks breaks it down.

As the rest of the components are added, one at a time, the flat side of an iron rake is used to mix it well before the next component is added. It should be pretty well mixed before the next step of rolling it in the tarp.

At this point, it takes two people. Each holds one corner and then the tarp is folded back onto itself, rolling and thoroughly mixing the components. Go back and forth a couple of times until it is all looks thoroughly mixed.

At this point, it takes two people. Each holds one corner and then the tarp is folded back onto itself, rolling and thoroughly mixing the components. Go back and forth a couple of times until it is all looks thoroughly mixed.

I use a large grain shovel to move the mixture into the raised bed. A 2×4 is dragged across the top to level it out.

Don’t plan on doing more than a couple of batches a day – it takes longer than you might think to do a batch, and it’s pretty heavy work.

New Chicks

A 7:30 a.m. phone call let me know to come to the post office to pick up my box of chicks.

A 7:30 a.m. phone call let me know to come to the post office to pick up my box of chicks.

Shiloh checking out the new additions.

Shiloh checking out the new additions.

Arrived today – 15 Rhode Island Reds and 11 Buff Orpingtons – all females. Here is my usual way of handling new chicks:

  1. Set up the brooder. This is a plastic “turtle” sandbox that my nephew outgrew about 12 years ago. We cut the center out of the top, making a nice opening yet tough for young chicks to flutter out of. Newspapers are added to the bottom.
  2. It is set up in the garage under the garage door opener. A cord holds a heat lamp above the brooder; it can be adjusted up or down as needed. If the chicks are huddled together, then it needs to go lower – if they are spread out away from the light, then it needs to be moved up.
  3. A small waterer is added. As each chick is removed from the box, I dip its beak in the water to get them started drinking. Most chicks start drinking immediately once they get a taste of the water.
  4. I sprinkle just a small amount of bird grit on the bottom to let them peck at it. Just a tiny bit – I don’t want them filling up on grit.
  5. I wait until they have all had plenty of time to drink and I see that its worked its way through their bodies before adding any food. My theory is that by getting their digestive tract working before giving any food, they they are less likely to have vent paste-up. I don’t know if that is true or not, but it can’t hurt.
  6. Several hours later, I add a feeder filled with chick starter.

That’s pretty much all there is to it. I regularly monitor their progress and make sure that the heat is right (judged by their behavior – not by a thermometer), keep the floor clean, add clean water and food as needed. I keep a piece of hardware cloth on the top opening to keep them from somehow fluttering out and to “keep the dog honest”.


Followup – Added one month later (February 28):
This is the most successful batch of chicks I have had yet. I only lost one – and that was not to a health issue. She somehow escaped from the “nursery pen”. The dog was doing his job and kept barking to let us know, but we figured he was just being an idiot so we ignored him. Since the chick couldn’t get back in with the rest of the checks, she decided to go into the ark with the rooster and the two grown hens. I locked them in at night and didn’t notice the chick in with them. In the morning, I found the dead chick when I went to let them out. I assume that she made it through the night OK since I would have seen her when I let them out. In the morning, the hens attacked and killed her. The rooster has never shown any aggression toward the chicks through the fence, but the two hens will peck at the chicks that get too close to the fence. Jealousy, I suppose.

Chickens in Africa

Following is a letter that I received from a missionary in Sierra Leone, West Africa who we work very closely with. They have plenty of experience raising chickens in America, but being in Africa changes the game completely. I am working on a reply – any suggestions would be appreciated!


I have some chicken questions and I was hoping that you could bounce them around your various hen-pecked friends. Any input is welcomed. I am seriously trying to get some notes together for you as you requested but it just has not happened. For now I will just address the troublesome situations with these incredibly neurotic birds. Rhode Island Reds they ain’t!

Problem One: they utterly refuse to go into the coop at night. Initially Mercy and I were herding them in. He is extremely good at it and we managed to force them in with relatively little trouble. Slowly but noticeably they became more difficult to persuade to go inside. We tried a light; a leg off the PV system. No way. For the last week I have given up and allow them to sleep outside. They are so content and my reluctance to force them in is that when they are in the coop they bunch up so badly that I regularly had suffocations. They tightly pack just inside the door as if to say, “Alright, you want us in but we will go no further.” There is plenty of room. They are not afraid of the coop; they go in and out all day; that is where the laying boxes are. I am just stymied by the behavior. When outside they loosely group together for the night but not in heaps like when inside. We are considering closing in the feeding shed, which is open on two sides, with gates that can be opened during the day to allow ranging in the yard and closed at night.(see picture at the bottom) The trouble with letting them just be out in the open at night is animals and particularly cobras whom we are told have a fondness for chicken. Suggestions?

Problem Two: we need a watering system. We have a water line running from the house tank to the poultry yard. Currently we just use plastic basins. It was never intended to stay that way and we have tossed around some ideas but are not settled on anything. I know that dirty water is a major source of disease and I am very diligent to keep it as clean as possible but it does get filthy. I told Stephen about your system, as much as I could remember anyway, so he is very curious about it. Currently we have about 145 birds. But keep in mind that we are seriously considering a major expansion. The market in this area for fresh eggs is huge and we want to take advantage of it to help fund the mission. So when considering water solutions think that we will have 1000 birds and a much larger coop. The coop will eventually have its own water tower and small PV system. The PV will more be for a few lights in the storage area but could perhaps run a small circulator pump. It needs to be effective but very simple; generator is not an option. But that is for the larger number which will be a year or more before it happens. Suggestions for both the small and large flock will be appreciated.

Problem Three: I have lost some hens to a strange illness. None of my books give me what I need to diagnose clearly. What happens is the birds develop a difficulty walking; their legs go stiff so that when they do walk they have to swing the legs out to the side. They look more like they are rowing than walking. Then they collapse and the wings go droopy. The head is alert and they are clearly in distress attempting to get back up on their legs. At the point of collapse the legs are straight out the back and extremely stiff. When I pick them up I can feel that they are having what I would call tremors especially in the shoulder area; sometimes these are fairly violent. Sometimes it is accompanied by raspy breathing, even gurgling. I have found that antibiotic given orally in a high dose (by force with a syringe) will generally keep them from dying. I don’t know if the illness itself is bacterial or if the antibiotics are merely treating secondary infection. Sometimes they appear to be improving and within an hour or so can be dead. I have an infirmary where I remove them to just in case it is contagious. The onset is rapid and death comes quickly if I don’t get it in time with antibiotic. Help!!

I have broad spectrum antibiotic which goes into the general water supply. I try to use it sparingly only as a treatment but it can be given at a lower dose for prevention. I have had a terrible time with cholera but thankfully not Newcastle. “Chickening” here is certainly different. I am weary of losing my beautiful birds.

This is the feeding shed.  The coop is to the right and opens directly to the shed; the roof joins the roof of the coop.  We are considering closing the two open sides so the birds can sleep outside but still be protected.  Here I am holding “White Boy” our only rooster to slip through the sexing process.  He and Mercy are sworn enemies and are very funny to watch.  These roosters do not have spurs!  White Boy is headed for the pot and has been put in jail as he was causing too many injuries to my girlies.  It is hard to see here but he is very pretty with lots of gold in his feathers.

This is the feeding shed. The coop is to the right and opens directly to the shed; the roof joins the roof of the coop. We are considering closing the two open sides so the birds can sleep outside but still be protected. Here I am holding “White Boy” our only rooster to slip through the sexing process. He and Mercy are sworn enemies and are very funny to watch. These roosters do not have spurs! White Boy is headed for the pot and has been put in jail as he was causing too many injuries to my girlies. It is hard to see here but he is very pretty with lots of gold in his feathers.

This is the coop.  The white portion to the left is cement block, ventilation screening on three sides, and a metal door.  The wooden part is the feeding shed.  The design is great but the dumb clucks will not use the coop at night.  I was wondering if it were too hot inside but they bunch up so badly.  It does get quite hot inside at night and I feel the temperature when I open the door in the morning.  But wouldn’t you think that if they were hot inside they would spread out like they do when they sleep outside?   Is it possible that if they are hot, they get distressed and bunch near the door thinking they can get out?  They are very neurotic and high strung so maybe that is the answer.   I know they go in there during the day because it can often be cooler inside but with them all inside and the door closed maybe the heat is too much.

This is the coop. The white portion to the left is cement block, ventilation screening on three sides, and a metal door. The wooden part is the feeding shed. The design is great but the dumb clucks will not use the coop at night. I was wondering if it were too hot inside but they bunch up so badly. It does get quite hot inside at night and I feel the temperature when I open the door in the morning. But wouldn’t you think that if they were hot inside they would spread out like they do when they sleep outside? Is it possible that if they are hot, they get distressed and bunch near the door thinking they can get out? They are very neurotic and high strung so maybe that is the answer. I know they go in there during the day because it can often be cooler inside but with them all inside and the door closed maybe the heat is too much.

Guess I’d better quit here. That really covers everything anyway. I will send you some more pix soon along with my notes about this breed – promise. I truly miss my RIR’s. Hope all is well with your little flock. Thanks in advance for your capable assistance.


Photo credit: Stephen and Laura Holt, Sierra Leone, West Africa

Pineapples

pineapple-welcome
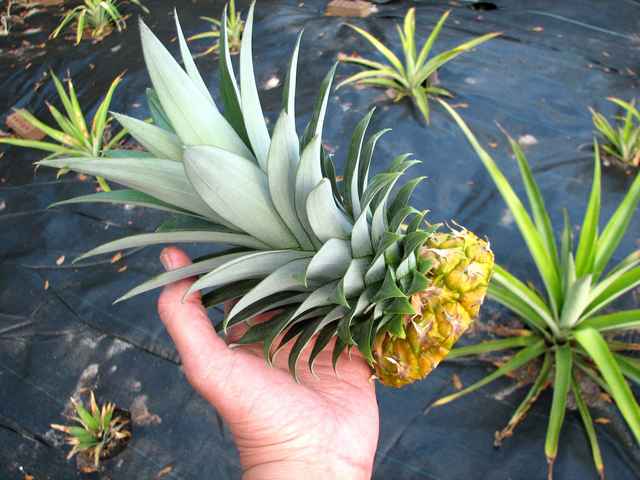
The pineapple has been considered a symbol of hospitality for centuries. If you were to play a word association game, you can bet that “Southern” would be the word that most folks connect to “Hospitality”. Consider making the pineapple a regular part of your home. While it is easy enough to just pick one up at the grocery store, why not save the top and grow your own?
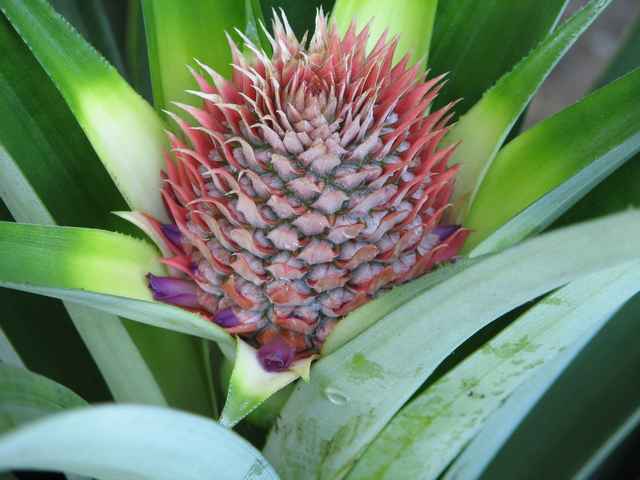
Pineapples grow well in containers or in the ground. Pineapple plants do not tolerate freezing temperatures below 28°F, and temperatures below 60°F and above 90°F may slow plant growth. Pineapples take anywhere from 18 to 24 months from time of planting to time of harvest. We have found that weed control fabric makes the pineapple patch upkeep much easier.

Pineapple bud - August 9

Pineapple bud – August 9

Pineapple bud - August 9

Pineapple bud – August 9

Pineapple almost ready to pick - December 15

Pineapple almost ready to pick – December 15. Wait until it is almost completely yellow to get the sweetest taste, but don’t let it go too long.

Top cutting ready to plant. Note the weed control fabric in the pineapple patch.

Top cutting ready to plant. Note the weed control fabric in the pineapple patch.


For more information on growing pineapples, see this IFAS publication.

In addition, this link includes some of the health benefits of pineapple as well as some recipes.

Save

Seeds – Hope for The Future

Survival Blog featured a great quote today about seeds:

“For thousands of years storing seeds has been an essential part of the survival preparations made by millions of prudent people fearing attack. Seeds are hopes for future food and the defeat of famine, that lethal follower of disaster. Among the most impressive sounds I ever heard were faint, distant, rattles of small stones heard on a quiet, black, freezing night in 1944. An air raid was expected before dawn. I was standing on one of the bare hills outside Kunming, China, trying to pinpoint the sources of lights that Japanese agents had used just before previous air raids to guide attacking planes to Kunming. Puzzled by sounds of cautious digging at about 2:00 AM I asked my interpreter if he knew what was going on. He told me that farmers walked most of the night to make sure that no one was following them, and were burying sealed jars of seeds in secret places, far enough from homes so that probably no one would hear them digging. My interpreter did not need to tell me that if the advancing Japanese troops succeeded in taking Kunming they would ruthlessly strip the surrounding countryside of all food they could find. Then these prudent farmers would have seeds and hope in a starving land.”
– Cresson H. Kearny, Nuclear War Survival Skills

Monte’s Pumpkin


Monte Poitevint
South Georgia

This picture shows the massive plant in the background, against my chicken pens. I never do anything to cultivate these pumpkins. They seemingly thrive on neglect. We throw our discarded pulp in the compost pile, and every year they come back. They love compost. I’ve tried planting them in my field with little success. My soil just isn’t rich enough for them, I guess. My compost consists of vegetable scraps and lots of chicken and rabbit manure. We got the original seeds from a neighbor years ago when he gave us a pumpkin he had grown (He grows them every year). The species itself is an unknown, but fairly common here in South Georgia. I believe it is an old Indian variety that has been grown here from generation to generation since the first settlers in the area, around 1820. At the auction where I sell my chickens, rabbits and produce, a fellow sets up every fall with a truck load of the same variety. He says he grows his in his field. He must have better soil than I do.

After harvesting, we cut the pumpkins up so as to fit on large pan, throw the pulp onto the compost pile, and bake them in an inch or two of water, skin and all (skin-side up), at 400 degrees till done, about 1 to 1-1/2 hours. We then scoop the baked meat out of the skin and freeze it back to use throughout the year. Good years, when we produce more pumpkins than we can eat, I haul the surplus to the auction and sell them. In a cool, dark space they keep for months.


Do have a photo and story you’d like to share on The Southern Agrarian? If so, send it to stephenmcgehee (at) gmail (dot) com – replacing the “at” and the “dot”, of course. If you don’t receive a reply from me within 24 hours, reply to any post to follow up. Photos should be sent in full resolution. If, for some reason, you do not want your full name used, be sure to let me know how you would like to be identified. Thanks for sharing – that’s how we all learn.

« Older posts Newer posts »