Southern Agrarianism and the culture of the Old South

Tag: garden (Page 3 of 4)

Carol Deppe’s Seed List

I have written previously about Carol Deppe‘s books – The Resilient Gardener and Breed Your Own Vegetable Varieties. She has a new seed list of varieties she has developed on her own. She is located in the Pacific Northwest, so I suspect that her seeds would probably not be the best choice for those of us down here in Dixie; however, you really need to read the seed descriptions so you can learn her thought process for selecting and developing the varieties in her garden. It also demonstrates the focus she has on matching local conditions to the varieties you select. Let me take this opportunity to again highly recommend both of her books. They should be in the library of anyone interested in growing and developing their own food.

The Resilient Gardener: Food Production and Self-Reliance in Uncertain Times

The Resilient Gardener: Food Production and Self-Reliance in Uncertain Times

Breed Your Own Vegetable Varieties: The Gardener's and Farmer's Guide to Plant Breeding and Seed Saving

Breed Your Own Vegetable Varieties: The Gardener’s and Farmer’s Guide to Plant Breeding and Seed Saving

Mixing The Growing Mixture

In our raised bed garden, we use a growing mixture (not really “soil”) made up of several components, so they must be thoroughly mixed before adding to the garden. Since we’re dealing with a couple hundred pounds in each batch, mixing take a bit of planning. Here’s how we do it:

A large tarp is spread out on the ground. The components are added and mixed one at a time. (Components are shown for illustration only - they are added one at a time.)

A large tarp is spread out on the ground. The components are added and mixed one at a time. (Components are shown on the tarp for illustration only.)

We always start with the Peat Moss. It comes in a compressed bale, so it has to be broken apart until it is all the same consistency. The flat side of a rake is used to spread it out, then just stepping on the chunks breaks it down.

We always start with the Peat Moss. It comes in a compressed bale, so it has to be broken apart until it is all the same consistency. The flat side of a rake is used to spread it out, then just stepping on the chunks breaks it down.

As the rest of the components are added, one at a time, the flat side of an iron rake is used to mix it well before the next component is added. It should be pretty well mixed before the next step of rolling it in the tarp.

At this point, it takes two people. Each holds one corner and then the tarp is folded back onto itself, rolling and thoroughly mixing the components. Go back and forth a couple of times until it is all looks thoroughly mixed.

At this point, it takes two people. Each holds one corner and then the tarp is folded back onto itself, rolling and thoroughly mixing the components. Go back and forth a couple of times until it is all looks thoroughly mixed.

I use a large grain shovel to move the mixture into the raised bed. A 2×4 is dragged across the top to level it out.

Don’t plan on doing more than a couple of batches a day – it takes longer than you might think to do a batch, and it’s pretty heavy work.

Pineapples

pineapple-welcome
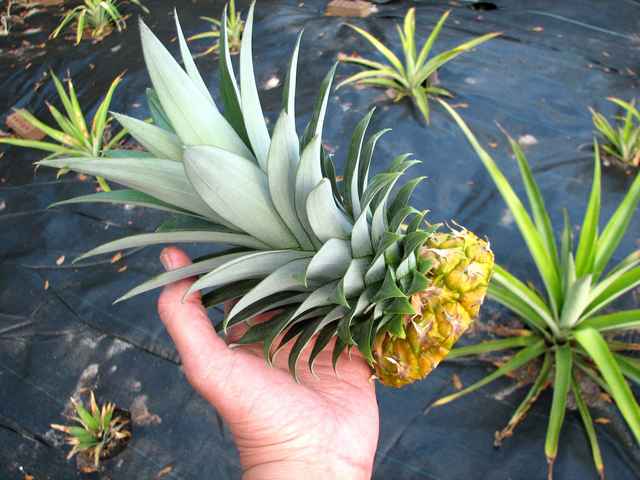
The pineapple has been considered a symbol of hospitality for centuries. If you were to play a word association game, you can bet that “Southern” would be the word that most folks connect to “Hospitality”. Consider making the pineapple a regular part of your home. While it is easy enough to just pick one up at the grocery store, why not save the top and grow your own?

Pineapples grow well in containers or in the ground. Pineapple plants do not tolerate freezing temperatures below 28°F, and temperatures below 60°F and above 90°F may slow plant growth. Pineapples take anywhere from 18 to 24 months from time of planting to time of harvest. We have found that weed control fabric makes the pineapple patch upkeep much easier.

Pineapple bud - August 9

Pineapple bud – August 9

Pineapple bud - August 9

Pineapple bud – August 9

Pineapple almost ready to pick - December 15

Pineapple almost ready to pick – December 15. Wait until it is almost completely yellow to get the sweetest taste, but don’t let it go too long.

Top cutting ready to plant. Note the weed control fabric in the pineapple patch.

Top cutting ready to plant. Note the weed control fabric in the pineapple patch.


For more information on growing pineapples, see this IFAS publication.

In addition, this link includes some of the health benefits of pineapple as well as some recipes.

Save

Monte’s Pumpkin


Monte Poitevint
South Georgia

This picture shows the massive plant in the background, against my chicken pens. I never do anything to cultivate these pumpkins. They seemingly thrive on neglect. We throw our discarded pulp in the compost pile, and every year they come back. They love compost. I’ve tried planting them in my field with little success. My soil just isn’t rich enough for them, I guess. My compost consists of vegetable scraps and lots of chicken and rabbit manure. We got the original seeds from a neighbor years ago when he gave us a pumpkin he had grown (He grows them every year). The species itself is an unknown, but fairly common here in South Georgia. I believe it is an old Indian variety that has been grown here from generation to generation since the first settlers in the area, around 1820. At the auction where I sell my chickens, rabbits and produce, a fellow sets up every fall with a truck load of the same variety. He says he grows his in his field. He must have better soil than I do.

After harvesting, we cut the pumpkins up so as to fit on large pan, throw the pulp onto the compost pile, and bake them in an inch or two of water, skin and all (skin-side up), at 400 degrees till done, about 1 to 1-1/2 hours. We then scoop the baked meat out of the skin and freeze it back to use throughout the year. Good years, when we produce more pumpkins than we can eat, I haul the surplus to the auction and sell them. In a cool, dark space they keep for months.


Do have a photo and story you’d like to share on The Southern Agrarian? If so, send it to stephenmcgehee (at) gmail (dot) com – replacing the “at” and the “dot”, of course. If you don’t receive a reply from me within 24 hours, reply to any post to follow up. Photos should be sent in full resolution. If, for some reason, you do not want your full name used, be sure to let me know how you would like to be identified. Thanks for sharing – that’s how we all learn.

Review of the 7″ Rogue Field Hoe by Prohoe

I don’t use a hoe very much – at least not as much as some people do.  Unlike many people though, I have a deep appreciation for high quality tools and don’t mind paying more for something that, if given reasonable care, my grandchildren will be able to use. The 7″ Rogue Field Hoe by Prohoe is such a tool.

Prohoe Manufacturing is a family owned business in Kansas. The grinding, welding, and sharpening are all done by hand. The steel used in their tools is from recycled agricultural disc blades – and that’s some very tough, high quality steel. They have a heft to them that makes it easier to use than the lightweight, made-in-China hoes that most folks (myself included) own and usually think of as a hoe. I have used mine for several years now, and while my made-in-China hoe has all sorts of small dents and deformations along the edge, my Prohoe is still just as sharp as can be without any significant deformation of the edge. I need to point out that this is very easy soil to hoe and your results may be different, yet the cheap hoe still will not hold an edge where the Prohoe does. As with any tool, cleaning matters. I am almost obsessive about making sure that my garden tools are thoroughly washed before being hung on their rack in the shop.

Prohoe makes a number of different designs, but the one I have is the 70F Field Hoe. I am just as satisfied as can be with my Prohoe field hoe and fully expect my grandchildren to inherit and use this hoe for many years.

Now for the usual disclaimer – I have no financial interest in Prohoe, I received no compensation of any kind for this review, and I paid for my hoe out of my own pocket – every penny of it. I really hate having to write this kind of disclaimer. It wasn’t long ago that men were honorable enough to simply tell the truth without the government having to tell them to do so. The idea of the government telling people to be honest has a delicious bit of irony, doesn’t it?

Keeping Squirrels Out Of The Garden

In the previous post, we looked at how to form hoops to use for supporting a covering over the garden. In this post, we use the hoops to add netting over the garden to keep squirrels from ruining our tomatoes. Obviously, this also keeps birds from damaging the garden.

The netting is made up of 4′ x 50′ rolls of plastic netting that I bought at Lowes Hardware. Because of the size needed for this project, it took five rolls sewn together to make a piece 20′ x 50′. To sew the pieces together, I roll them out on the concrete driveway and sew them together using trot line cord that can be found wherever fishing equipment is sold (at least down here in The South, since it is used for catching catfish). I made a “sewing needle” from a piece of stiff wire and formed an “eye” in one end. Bend a bit of a curve in it to make it easier to use.

Each hoop consists of:
• 10 section of 1/2″ EMT (galvanized metal electrical conduit) bent into a 4′ radius
• Two 5′ sections of thin-wall PVC pipe slipped over each end of the metal conduit. There is a 3″ overlap on each end.
• Duct tape at each joint to keep it from slipping.

Try to keep all hoops uniform in size and shape. When the hoops are assembled, any differences will become very noticeable and make the finished structure look very sloppy.

The finished structure includes three sections of PVC pipe cable-tied to the sides and the top. This provides support for the covering and makes the whole structure strong enough to hold it together. When it is time to disassemble the structure, just cut the cable ties and the whole thing can be easily stored in a fairly small space.

Side view of the hoops and netting covering the tomatoes

End view. Squash is in the foreground.

There are three sections of PVC pipe that run the length of the frame - one on each side and one along the top.

It is important to keep the lengths of PVC pipe on the INSIDE of the hoops. Otherwise, the covering will hang up on it and be very difficult to work with. For the same reason, the cable tie ends must also point toward the inside.

Hoop Frames

Hoop frames are a great way to support any kind of covering over a garden. They can be used for a cold frame to protect from frost damage, with netting to prevent damage by birds and squirrels and rabbits, and even to prevent insect damage. Hoop frames can be made in various sizes, from small covers for a 4′ wide raised-bed garden, to a full sized greenhouse. In this post, we’ll be making small frames for the raised bed garden. The material will be half-inch EMT (Electrical Metallic Tubing), commonly known as metal conduit.

The trick to bending hoop frames is having the right tool for the job – in this case, we’ll be building a jig designed for the job. Without a bending jig, you end up with kinked pipe and uneven bends. Aesthetics play a big role in enjoying your garden. Make sure that what goes into the garden is neat and attractive looking.

This jig was built using mostly scraps. The plywood was a badly warped piece that probably should have been cut up and thrown away long ago. The 2×4 pieces were various short pieces that I just couldn’t bear to throw away, so they were stacked in the pole barn. The table frame that they are mounted on was originally built to hold a container garden at waist-high level. The clamps were needed not only to secure the plywood base to the table frame, but to flatten down some major warp in the plywood.

Materials Needed

  • 10′ section of 1/2″ EMT for each hoop
  • 1/2″ PVC 1120 pipe (thin wall) for in-the-ground legs
  • 2×4 to make the arc of the jig
  • Plywood for the base of the jig
  • 1/4-20 x 2 1/2″ bolts and nuts and washers

In the next post, we’ll show how we used it to add netting to prevent damage from squirrels and birds.

Measure from the center point at the top of the arc to find where you need to start the bend.

Start bending the EMT around the jig.

Continue bending the EMT, making sure that it stays flat against the base and doesn't slip.

When the bend is complete, make sure that you don't bend it any more since it is no longer supported by the jig and you will have an uneven bend.

Remove the hoop frame from the jig and adjust if needed.

The finished hoop frame pushed directly into the growing mixture. For taller hoop frames, you may want to insert lengths of PVC pipe over the ends.

Farm Dogs

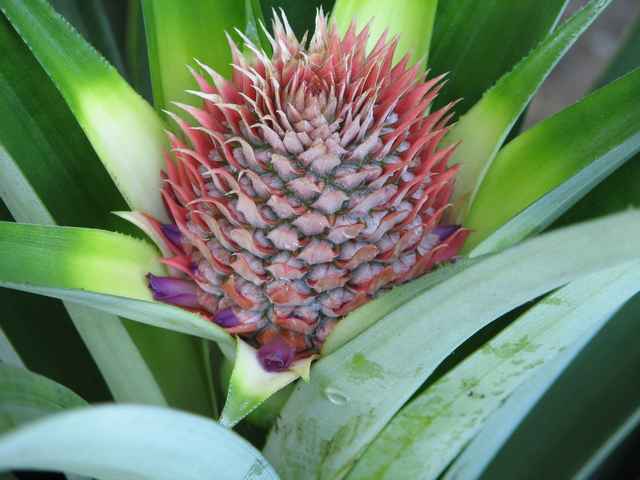
Few things represent the rural agrarian life more than the farm dog. In addition to the companionship that dogs provide, the farm dog really earns his keep. With only one acre, we hardly qualify as living on a farm, yet our dog still has his job and he does it well.

Shiloh is our Shetland Sheepdog (also known as a Sheltie). At 35 pounds, he is a good bit larger than the standards call for, which is why he lost his value as a stud dog and we were able to get him. When pests invade the garden, Shiloh chases them away. An unusual pest for most folks but not uncommon for us is wild peacocks that sometimes get into the garden until Shiloh chases them away. Another job that Shiloh does well is catching chickens that fly over their fence and get into the garden. It’s almost as much fun watching that as it is watching a Border Collie working sheep. He chases the chicken and tries to corner it. The chicken will eventually give up and stop and he just stands over it to keep it from leaving. He never tries to bite or harm the chicken in any way. If we aren’t out there at the time, he will bark to let us know that he needs help. I walk over and pick up the chicken and put it back over the fence. The chickens are usually quite happy to see me after dealing with the dog.

Shiloh as a young puppy, holding a chicken

Deep Planting Tomatoes

One of the first things that anyone learns about transplanting tomatoes is that they should be planted as deep as possible. All the leaves and branches except for those at the very top of the plant should be pinched off and then plant it deep enough so that only those leaves at the tip of the plant are above ground.

I suspect that I’m not the only one who has wondered if the plants ever really catch up in height after being buried that deeply. I decided to find out.

When I plant the garden, in addition to the plants that are spaced out as they should be, I try to always plant some extras so that any that don’t survive or are the victim of bugs or other pests can be quickly replaced. In this case, I planted the spares right next to the primary plants so we can compare them. The primary plants were buried as deep as the plant would allow. The spare plants were planted at the same depth they were at the soil blocks and pots. After a couple of weeks, you can see that the deep buried plants quickly recovered their “lost” height. In addition, the plants had much thicker trunks and are generally more vigorous plants.

The tomato variety shown here is Jaune Flammé (often just referred to as Flammé). These are a French heirloom tomato that produces golf-ball sized tomatoes that are an apricot color when ripe. This is a very prolific indeterminate variety – and clearly the best tasting variety that I know of. They’re too small to make a good sandwich tomato, but for salads and just eating by themselves, they are incredibly delicious. The fact that they don’t turn bright red makes them less attractive to birds, and that’s always a good thing.

The tomato plants are set out using the tomato cages turned upside down to get the correct spacing.

Tomato plant as-grown, before the pre-planting pruning is done.

After pruning, ready to be planted.

Pruned and ready for planting.

The growing mixture we use is easy to dig by hand, so we don't use the garden trowel very often. The hole is deeper than you might think.

In the past, I have had problems due to missing trace elements. Adding a small amount of tomato-specific fertilizer should eliminate such problems.

Add just a bit of tomato fertilizer to the bottom of the hole.

The roots have been growing around the sides of the pot. It's best not to let them go much longer than this stage.

With a bit of tomato fertilizer in the bottom of the hole, then a small amount of soil mixture to cover it, the plant is added.

The hole is filled and gently tamped.

Finally, a tomato cage is pushed down around the plant, and that's it.


22 Days Later

This is one of the spare plants that was planted at its original depth. The plant to the right (in the cage) was deep planted at the same time this spare was planted.

This is one of the primary plants. When planted, everything except the very top of the plant was pinched off and then it was deep planted so that only the top of the plant was above ground level. A spare plant can be seen to the left - the primary and spare plants have reached the same height despite starting out very differently. Note how thick the plant trunk is on the primary plant.

Pruning Tomatoes – Sucker Removal

Until very recently, I did not prune my tomato plants. I figured that the more leaf surface, the better. Up to a point, that is true. The problem is that if you have good fertile soil and plenty of water, the plant can quickly grow far to dense. Too many leaves and branches mean that:

  • Plant energy is going into producing more plant – not more fruit.
  • Fruit, unless it is growing on the outside edge of the plant, is difficult to see and to pick.
  • Poor air circulation means that disease and insect infestation can quickly get out of hand.
  • Leaves and branches tend to yellow and die for lack of sun. They then rot and become a magnet for insects and disease.
  • If you can’t see all of your plant, you can’t care for it.

The first type of pruning is sucker removal. We’ll look at the other type of pruning in a future post. Suckers are what grow out of the top of the joint between the main trunk of the plant and a branch. In the following two photos, I’ve indicated the suckers. These are pinched off or cut off as soon as the appear. They grow quickly, so check your plants regularly.


An added benefit to removing suckers is that they sprout roots very easily by just sticking them in the ground.

This is what happens when plants are not pruned. These are too dense for a healthy plant and a good yield.

« Older posts Newer posts »